What Is Cable Gland Torque Specifications and Why It Matters
Cable gland torque refers to the rotational force applied when tightening a cable gland during installation. Getting this force right is the single most important factor in achieving a reliable, long-lasting seal. Too little torque and the seal never compresses enough to block water, dust, or vibration. Too much torque and you risk cracking the gland body, extruding the sealing ring, or crushing the cable jacket.
Installers often ask how tight should a cable gland be, and the answer depends on three variables: the gland material (nylon, brass, or stainless steel), the thread size, and the sealing point being tightened. Manufacturers publish specific torque ranges for each combination, and following them is the difference between an IP68 rating that holds for years and one that fails after the first rainstorm.
Every cable gland has two critical tightening points: the body-to-enclosure connection and the compression nut that seals around the cable. Each point requires a different torque value, and skipping either one compromises the entire sealing system.
Key Sealing Points in a Cable Gland
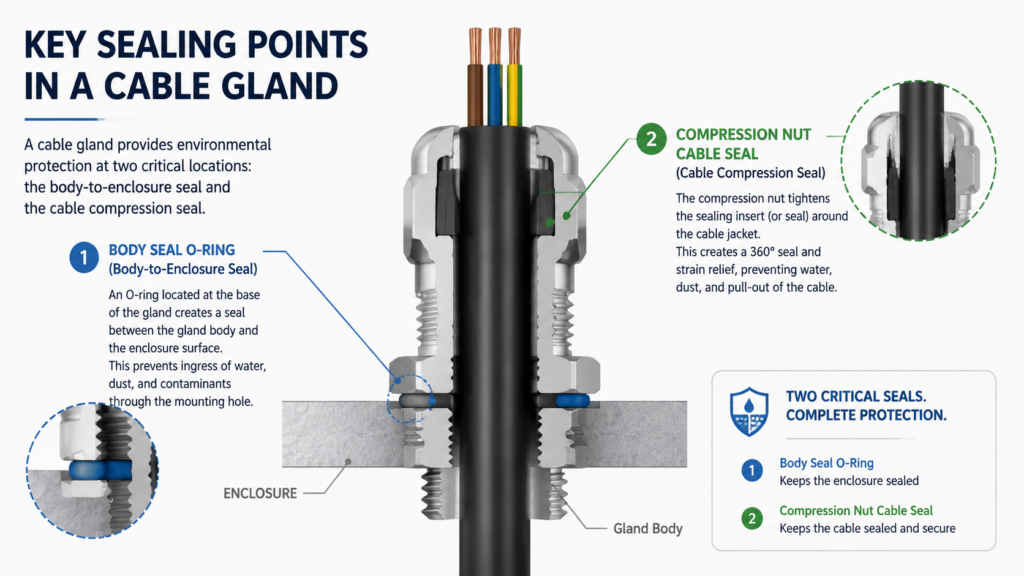
Before applying any torque, you need to understand where the seals happen. A typical cable gland creates waterproof integrity at two distinct interfaces. Understanding these sealing points helps you know exactly where to apply torque and what each point protects.
Sealing Point
Components Involved
Function
Body-to-enclosure seal
Gland body thread + sealing washer or O-ring + locknut
Seals the gland against the panel or junction box wall, preventing water and dust from entering around the threaded entry hole
Cable seal (compression seal)
Compression nut + sealing grommet or ring + cable jacket
Compresses an elastomer ring around the cable outer diameter, creating a watertight and strain-relief grip
Thread engagement
Gland body thread + enclosure tapped hole or locknut
Provides mechanical retention and, on tapered threads like NPT, contributes to the seal through metal-to-metal contact
The body-to-enclosure seal is often overlooked because installers focus on the compression nut. However, if the sealing washer is missing, backward, or not compressed enough, water can travel along the thread path and enter the enclosure even when the cable seal is perfect. Always verify that the sealing washer is seated flat against a clean enclosure surface before tightening the body or locknut.
Cable Gland Torque Specifications by Material
Different gland materials have different mechanical limits. Nylon can crack under excessive force, while brass and stainless steel can handle higher torque but still require calibrated tools to avoid thread galling or seal damage. The table below provides reference torque ranges for the most common thread sizes across all three materials.
Material
Thread Size
Body Torque (Nm)
Sealing Nut Torque (Nm)
Nylon
M12 to M16
8 to 15
2 to 3
Nylon
M20 to M25
12 to 20
3 to 5
Brass
M12 to M16
12 to 20
5 to 8
Brass
M20 to M25
20 to 35
8 to 12
Brass
M32 to M40
30 to 45
12 to 18
Stainless Steel
M12 to M16
15 to 25
6 to 10
Stainless Steel
M20 to M25
25 to 40
10 to 15
Stainless Steel
M32 to M40
35 to 55
15 to 22
For nylon glands, a practical field method when a torque wrench is unavailable is hand-tight plus a quarter turn with a wrench. If you see stress marks or whitening on the nylon body, you have exceeded the safe torque range. For brass and stainless steel glands, always use a calibrated torque wrench in industrial or outdoor installations.
If you are working with nylon glands specifically, the divided structure nylon cable gland offers a split-body design that simplifies cable insertion while maintaining the same torque and sealing principles. For brass installations, the brass standard cable gland is engineered to meet the torque ranges listed above. Stainless steel applications benefit from the standard stainless steel cable gland, which handles higher torque values without galling when proper thread lubrication is applied.
Torque Specifications by Thread Standard
Beyond material, the thread standard also affects torque values. Metric threads (M-series) and NPT threads have different geometries that influence how torque translates into sealing force. The following table covers NPT thread sizes commonly used in North American installations.
NPT Thread Size
Body Torque (Nm)
Sealing Nut Torque (Nm)
Typical Cable OD Range (mm)
3/8 NPT
3.5 to 5.0
2.5 to 3.5
5.0 to 10.0
1/2 NPT
5.0 to 7.0
3.5 to 5.0
6.0 to 12.0
3/4 NPT
7.0 to 9.0
5.0 to 7.0
13.0 to 18.0
1 NPT
10.0 to 12.0
7.0 to 9.0
18.0 to 25.0
NPT threads are tapered, which means they create a metal-to-metal seal as they tighten. This is different from parallel metric threads, which rely entirely on a sealing washer or O-ring for the body-to-enclosure seal. Because of this taper, NPT glands may require thread sealant or PTFE tape on the body thread, but never on the compression nut thread.
Step-by-Step Installation with Correct Torque
Applying the right torque in the right sequence is just as important as knowing the values. Follow these steps to ensure both sealing points are properly tightened.
Prepare the enclosure. Clean the threaded entry hole, remove any paint or burrs, and verify the hole diameter matches the gland thread size. Position the sealing washer flat against the enclosure surface.
Prepare the cable. Measure the cable outer diameter with calipers and confirm it falls within the gland sealing range. Strip the outer sheath to the required length if specified by the manufacturer.
Disassemble the gland. Unscrew the compression nut from the body and remove the sealing grommet. Lay out all components in assembly order to avoid missing parts.
Thread components onto the cable. Slide the compression nut onto the cable first, followed by the sealing grommet and any clamping components. For pre-terminated cables, slide all components on before making connections.
Install the gland body into the enclosure. Hand-tighten the body or locknut to verify proper thread engagement, then use a torque wrench to tighten to the specified body torque. Hold the body steady so it does not rotate while tightening the locknut.
Position the sealing grommet. Pull the cable back slightly so the grommet sits correctly inside the body. Ensure it is centered and not twisted.
Tighten the compression nut. Hand-tighten first, then apply the specified sealing nut torque with a wrench. Stop immediately if you feel the torque drop suddenly, which may indicate seal extrusion or thread stripping.
Verify the seal. Perform a pull test, rotation test, and visual inspection before energizing the system.
For a more detailed walkthrough of brass gland installation procedures, see our step-by-step brass cable gland installation guide, which covers armor preparation and earth continuity in addition to torque.
Common Torque Mistakes and How to Avoid Them
Most cable gland seal failures trace back to torque errors. Here are the most frequent mistakes and their consequences.
Mistake
Consequence
Prevention
Over-tightening the compression nut
Sealing ring extrudes or splits, nylon body cracks, cable jacket deforms
Use a calibrated torque wrench and follow the manufacturer range for the specific gland size
Under-tightening the body or locknut
Body-to-enclosure seal fails, water enters along the thread path
Tighten the body to the specified torque and verify the sealing washer shows slight even compression
Using a wrench instead of a torque wrench
Inconsistent torque across installations, especially with nylon glands
Use a calibrated torque wrench for all industrial and outdoor installations
Skipping the sealing washer
No body-to-enclosure seal, thread path becomes a water channel
Always install the sealing washer or O-ring and verify it is seated flat before tightening
Tightening with the cable under tension
Seal compresses unevenly, cable works loose over time from vibration
Leave a small service loop and ensure the cable is relaxed before final torque
Reusing a removed nylon gland
Compression seal is permanently deformed and cannot reseal reliably
Always use a new gland for reinstallation; nylon sealing rings are single-use
Once you have applied the correct torque, verification confirms the seal will hold. These checks take only a few seconds and catch problems before they become field failures.
Visual inspection: The sealing washer should show slight, even compression with no gaps. The compression nut should be fully threaded onto the body with no exposed threads. The cable jacket should show no bulging, cracking, or deformation at the seal point.
Pull test: Grasp the cable and pull firmly along its axis. A properly sealed cable should not move within the gland. If it slides, the compression nut torque is too low or the cable OD is below the gland sealing range.
Rotation test: Try to rotate the cable within the gland. A correctly compressed seal grips the jacket and prevents rotation. If the cable turns, re-tighten the compression nut to the specified torque.
Water test (critical applications): For IP68 installations, spray water around the gland entry point or perform a brief immersion test. Open the enclosure afterward and check for moisture. Document the result for quality records.
For metal glands used in armored or hazardous-area installations, also verify earth continuity with a multimeter. The resistance from armor to enclosure should measure below 0.1 ohms, confirming the gland provides a proper fault-current path.
Conclusion
Correct cable gland torque is not a guess-and-check exercise. By matching the torque value to the gland material and thread size, tightening in the right sequence, and verifying both sealing points, you ensure the rated IP protection holds for the life of the installation. When in doubt, reach for a torque wrench and the manufacturer datasheet rather than relying on feel alone.
A cable gland should be tightened to the torque specified by the manufacturer for the gland material and thread size. For nylon glands in M20 size, that is typically 12 to 20 Nm for the body and 3 to 5 Nm for the compression nut. For brass M20 glands, use 20 to 35 Nm for the body and 8 to 12 Nm for the sealing nut. Always use a torque wrench for consistent results.
What happens if you over-tighten a cable gland?
Over-tightening a cable gland can crack nylon threads, extrude the sealing ring out of its seat, crush the cable jacket, and reduce the effective sealing contact area. In brass and stainless steel glands, excessive torque can cause thread galling, which seizes the nut to the body and makes future maintenance impossible without destroying the gland.
Do I need a torque wrench for cable gland installation?
For industrial, outdoor, or IP68-rated installations, a calibrated torque wrench is strongly recommended. It ensures consistent torque across all glands on a project and prevents the guesswork that leads to seal failures. For quick indoor or low-risk installations, hand-tight plus a quarter turn with a standard wrench is acceptable for nylon glands but still not ideal.
What are the two sealing points in a cable gland?
The two sealing points are the body-to-enclosure seal and the cable compression seal. The body-to-enclosure seal uses a sealing washer or O-ring between the gland body and the enclosure wall, tightened via the locknut or body thread. The cable compression seal uses an elastomer grommet compressed by the nut around the cable outer diameter.
Can I reuse a cable gland after removing it?
Nylon cable glands should not be reused after removal because the elastomer sealing ring is permanently deformed after the first compression and will not reseal reliably. Brass and stainless steel glands can sometimes be reused if the sealing ring is replaced and all threads are undamaged, but always check the manufacturer instructions before reinstalling.
What torque should I use for NPT cable glands?
For NPT cable glands, body torque ranges from 3.5 to 5.0 Nm for 3/8 NPT, 5.0 to 7.0 Nm for 1/2 NPT, 7.0 to 9.0 Nm for 3/4 NPT, and 10.0 to 12.0 Nm for 1 NPT. The sealing nut torque is lower, typically 2.5 to 9.0 Nm depending on the NPT size. Because NPT threads are tapered, avoid using PTFE tape on the compression nut thread.
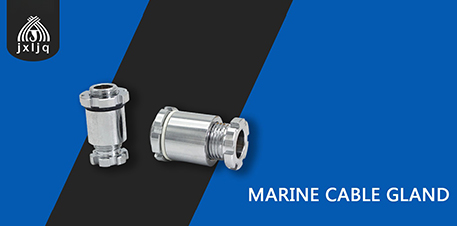
A marine cable gland is a sealing device used for cable entry in industrial electrical installations, shaped like a sleeve. When a cable passes through the gland, epoxy glue or a compression seal is used to achieve explosion-proof, waterproof, and dust-proof sealing at the enclosure entry point. On a ship, every cable that passes through […]
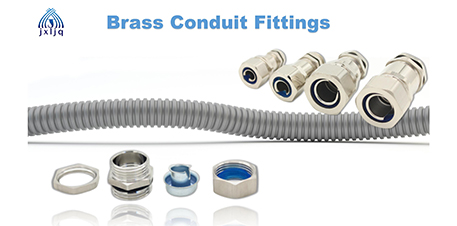
What brass conduit fittings are, why nickel-plated brass is used, the types, key specifications, applications, installation steps and how to choose the right fitting.
Why robot cables fail at entry points, how strain relief cable glands protect them, where they matter in a robotic cell, and how to choose and install them.
We use cookies to enhance your browsing experience, serve personalised ads or content, and analyse our traffic. By clicking "Accept All", you consent to our use of cookies.